How I made our small wildlife pond
This week I wanted to share how I made our small wildlife pond last spring - it’s a long post, but it’s also full of photos. I’ve turned the comments on, so if you get to the end and have a question, please do ask!
This is the first wildlife pond I created from scratch so I did a lot of online research before starting, to decide what features I wanted to include, how to make it a pond that would benefit nature, and to figure out what tools and supplies I needed to get the job done. There’s so much useful information available for wildlife ponds of all sizes and types - most wildlife-related websites offer pond-building advice and I think any of the Gardener’s World videos about ponds are helpful (and just nice to watch).
Here’s the story of how our small wildlife pond came to be…
Part 1 - The location
Our front garden has changed a lot since we moved in. It started as a flat, grassy area enclosed on the south by a young beech hedge, shaded by tall sycamore maples on the east, dropping off to our front path on the west and bordered by our house on the north. In the first two years here, I used this space for several long beds for growing flower crops.
Flowers grew well here and the space looked fairly tidy, but after two years, I felt like the garden could be used more efficiently while also being made more wildlife-friendly. I also wanted it to be a place where we could sit and watch the birds. I’d been wanting to add a small wildlife pond to our garden, so I included one in the plan alongside a small place for a table and chairs.


Part 2 - Digging and lining the pond
I started working on the pond in late March 2020. The first thing I did was to plan the shape and depth, using garden hose and heavy twine to lay out my paths and the pond edge. I added a small pebble ‘beach’ to the plan because it would be a good place for wildlife to leave the pond and I added a damp, marshy area for some moisture-loving irises I have. The irises in the marsh would provide cover for wildlife traveling between the pond and the wilder parts of the garden. I planned for the pond to have shelves at a few depths - for aquatic plants - and to be 2 feet deep at its lowest point (the advice I found quoted 2 feet as a good depth for providing wildlife with protection from weather extremes). Finally, I started excavating, using a long spirit level to make sure I didn’t have any sides that were too low where water could run out.

Getting started with digging out the pond!

Pond excavation is finished and it’s ready for the pond liner.
Once I was happy with the shape and the depth, I removed all sharp stones, metal and glass from the pond and cut back any tree roots. I was ready to line the pond with pond liner! I chose to use underlay between the earth and the rubber liner because our soil has lots of stones, and I wanted the pond liner to be protected from sharp edges. I doubled the underlay at the shelf areas because I was going to be placing rocks on the pond liner and I wanted there to be more cushioning at those points.
I bought my liner and underlay from this online shop. All of the pond supply shops I’ve found provide calculators for figuring out how much pond liner you need for your project (along with lots of other installation advice) which is really helpful.
The next step was to fill the pond, letting the liner gradually sink down into the hole, and gently smoothing out large folds in the rubber. We save lots of rainwater over the winter so I was able to use some of that to fill the pond. This is also when I filled the marsh area with soil, having first made a few holes in the pond liner at the bottom of the marsh - I wanted it to retain some water but not be water-tight at the bottom.

Filling the pond with rainwater.

The pond after filling it with water and planting irises in the small marsh area at the back left,
Part 3 - Adding the rocky edge
After the pond was mostly (but not quite all the way) full, I checked the sides again, to see if I needed to raise any areas up with additional soil. Once I was happy that the edges were level, I started placing rocks in the pond and building them up around the edges. I was aiming for a rocky, natural-looking edge that would provide aquatic wildlife with hiding places and allow larger animals to enter and escape from the water. I also tried to leave nooks between the rocks where I could tuck pots of aquatic plants. We have a lot of rocks in our garden, from old walls and buildings, so I was able to get all the rocks I needed from what we already had.
This is when I realised the beach area (at the far side of the pond) was too low and I needed to add soil under the liner to raise it up a bit - I didn’t want the entire beach to be submerged in water. Once the beach was fixed, I finished placing as many rocks as I thought were needed to hide and secure the rubber liner and to support the remaining rocks that would go around the outside edges. Then I trimmed the liner and the underlay.
I hid the trimmed edges of the pond liner under more rocks and spread pea gravel on the pathways and across the beach area. Then I added a wildlife woodpile between the marsh and beech hedge to act as a little wildlife corridor between the pond and the meadow.


After trimming the excess pond liner.


Part 4 - Adding aquatic plants to the pond
In choosing aquatic plants for this pond, I wanted plants that would provide food for pollinators, cover for wildlife, oxygenate the water, not overtake a small pond too quickly, and would look nice. I ordered my plants from this supplier. (Remember - when you’re purchasing aquatic plants, always be sure you’re buying from a reputable source and that you’re not buying anything that’s invasive or endangered.) These are the plants I decided to order:
Pennyroyal - provides purple flowers for bees and cover for aquatic life
Water forget-me-not - provides blue flowers for bees and cover for aquatic life
Willow moss - an oxygenator, evergreen and slow-growing
Water Crowfoot - an oxygenator, also makes white flowers in summer (this one grew really well in our little pond and I had to remove some of it)
Lesser water plantain - a pretty, small plant
Iris versicolor - tall foliage and pretty flowers in summer
Water lily ‘Snow princess’ - a variety suitable for small ponds, provides cover for wildlife and helps keep the pond cool in summer.
The plants arrived in early May and grew well over the summer - here’s how they looked after four months…
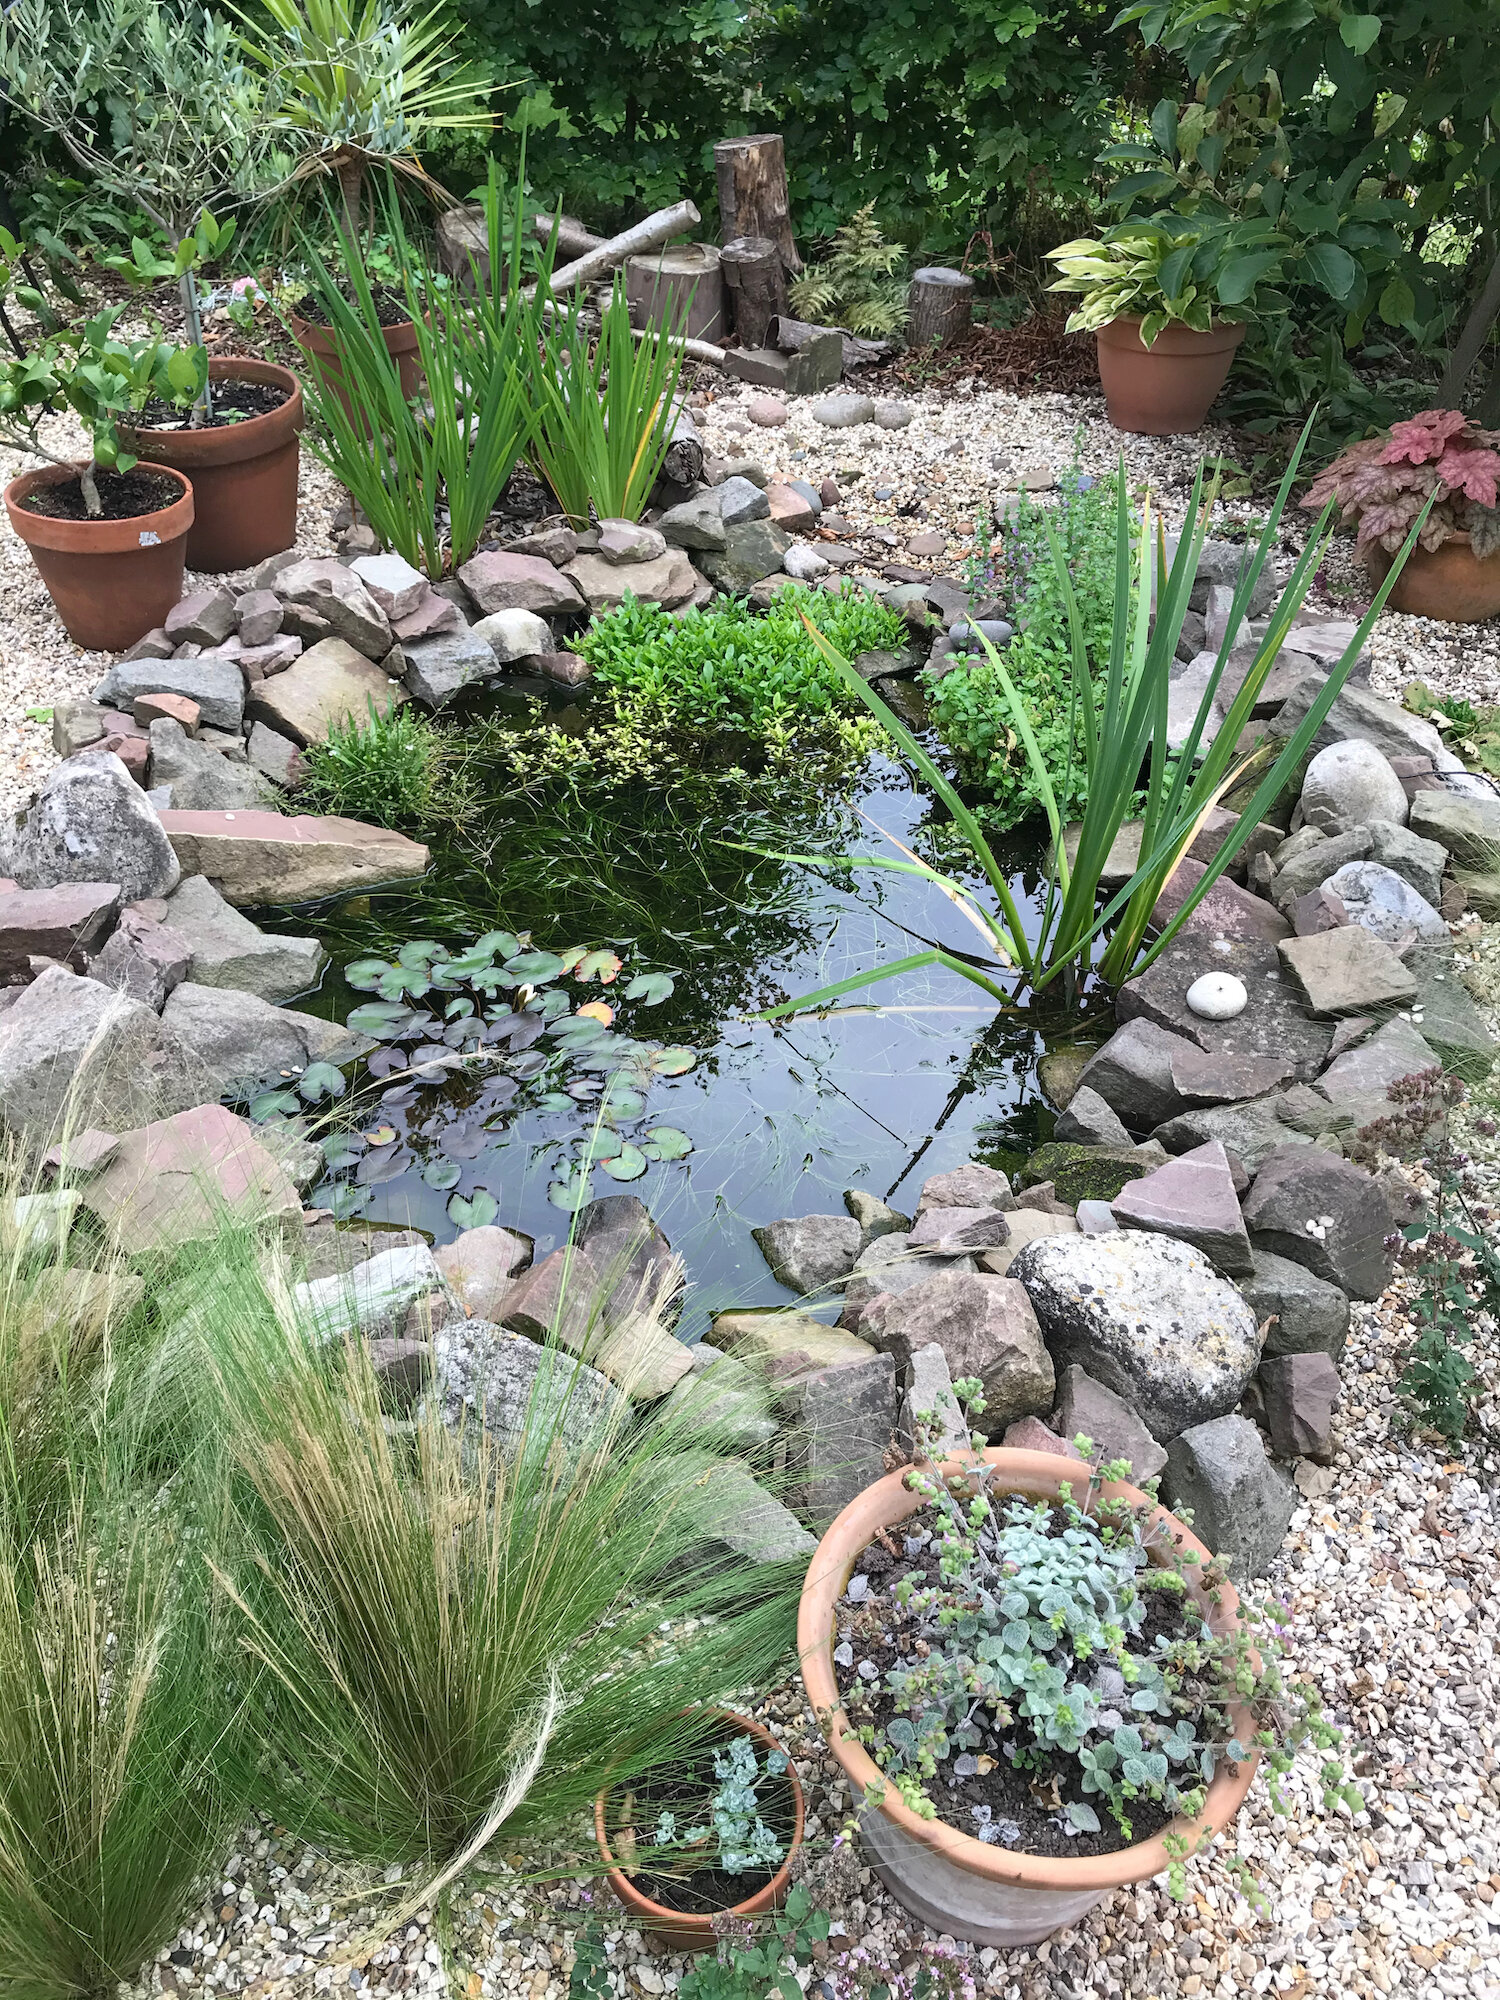
Aquatic plants after a summer of growth.

Lesser water plantain with its sweet little flowers.
Part 5 - Planting the garden
My planting scheme for the pond garden is very relaxed. I wanted it to be a soothing and informal place to sit in nice weather and to have some interest over the winter. I also wanted to be able to cut flowers from this garden, so nearly everything I grow here is something I can use in a bouquet. I planted a mix of perennial flowers, bulbs, herbs and grasses and throughout the year I added annuals and biennials in any space I could find. Around the pond and on the gravel path, I placed potted plants, occasionally moving them around to give the garden a different look.


The pond garden in April 2021. The beech hedge is finally shedding last year’s leaves, getting ready to grow its new foliage, and the spring winds blew the old leaves straight into the pond - I need to do some cleaning!

Memories of summertime - the pond garden in August. I can’t wait for all of this lovely green growth to return.
I’m really happy with how this garden turned out, and it’s become a favorite space of mine. I can’t wait to see how it matures and evolves over the next few years.
Thank you for reading!