Five easy-to-dry flowers
Today I’m sharing five easy-to-dry flowers. These are great to start with if you’re new to flower drying, and they’re all annuals which means you can go from seed to dried flower in one growing season. What makes these easy to dry? It’s obvious to tell when they’re ready to cut, drying them is straightforward and they all have strong colours that last for years. There’s also some general advice on picking and drying flowers towards the end of the post.
Strawflowers (Xerochrysum bracteatum)
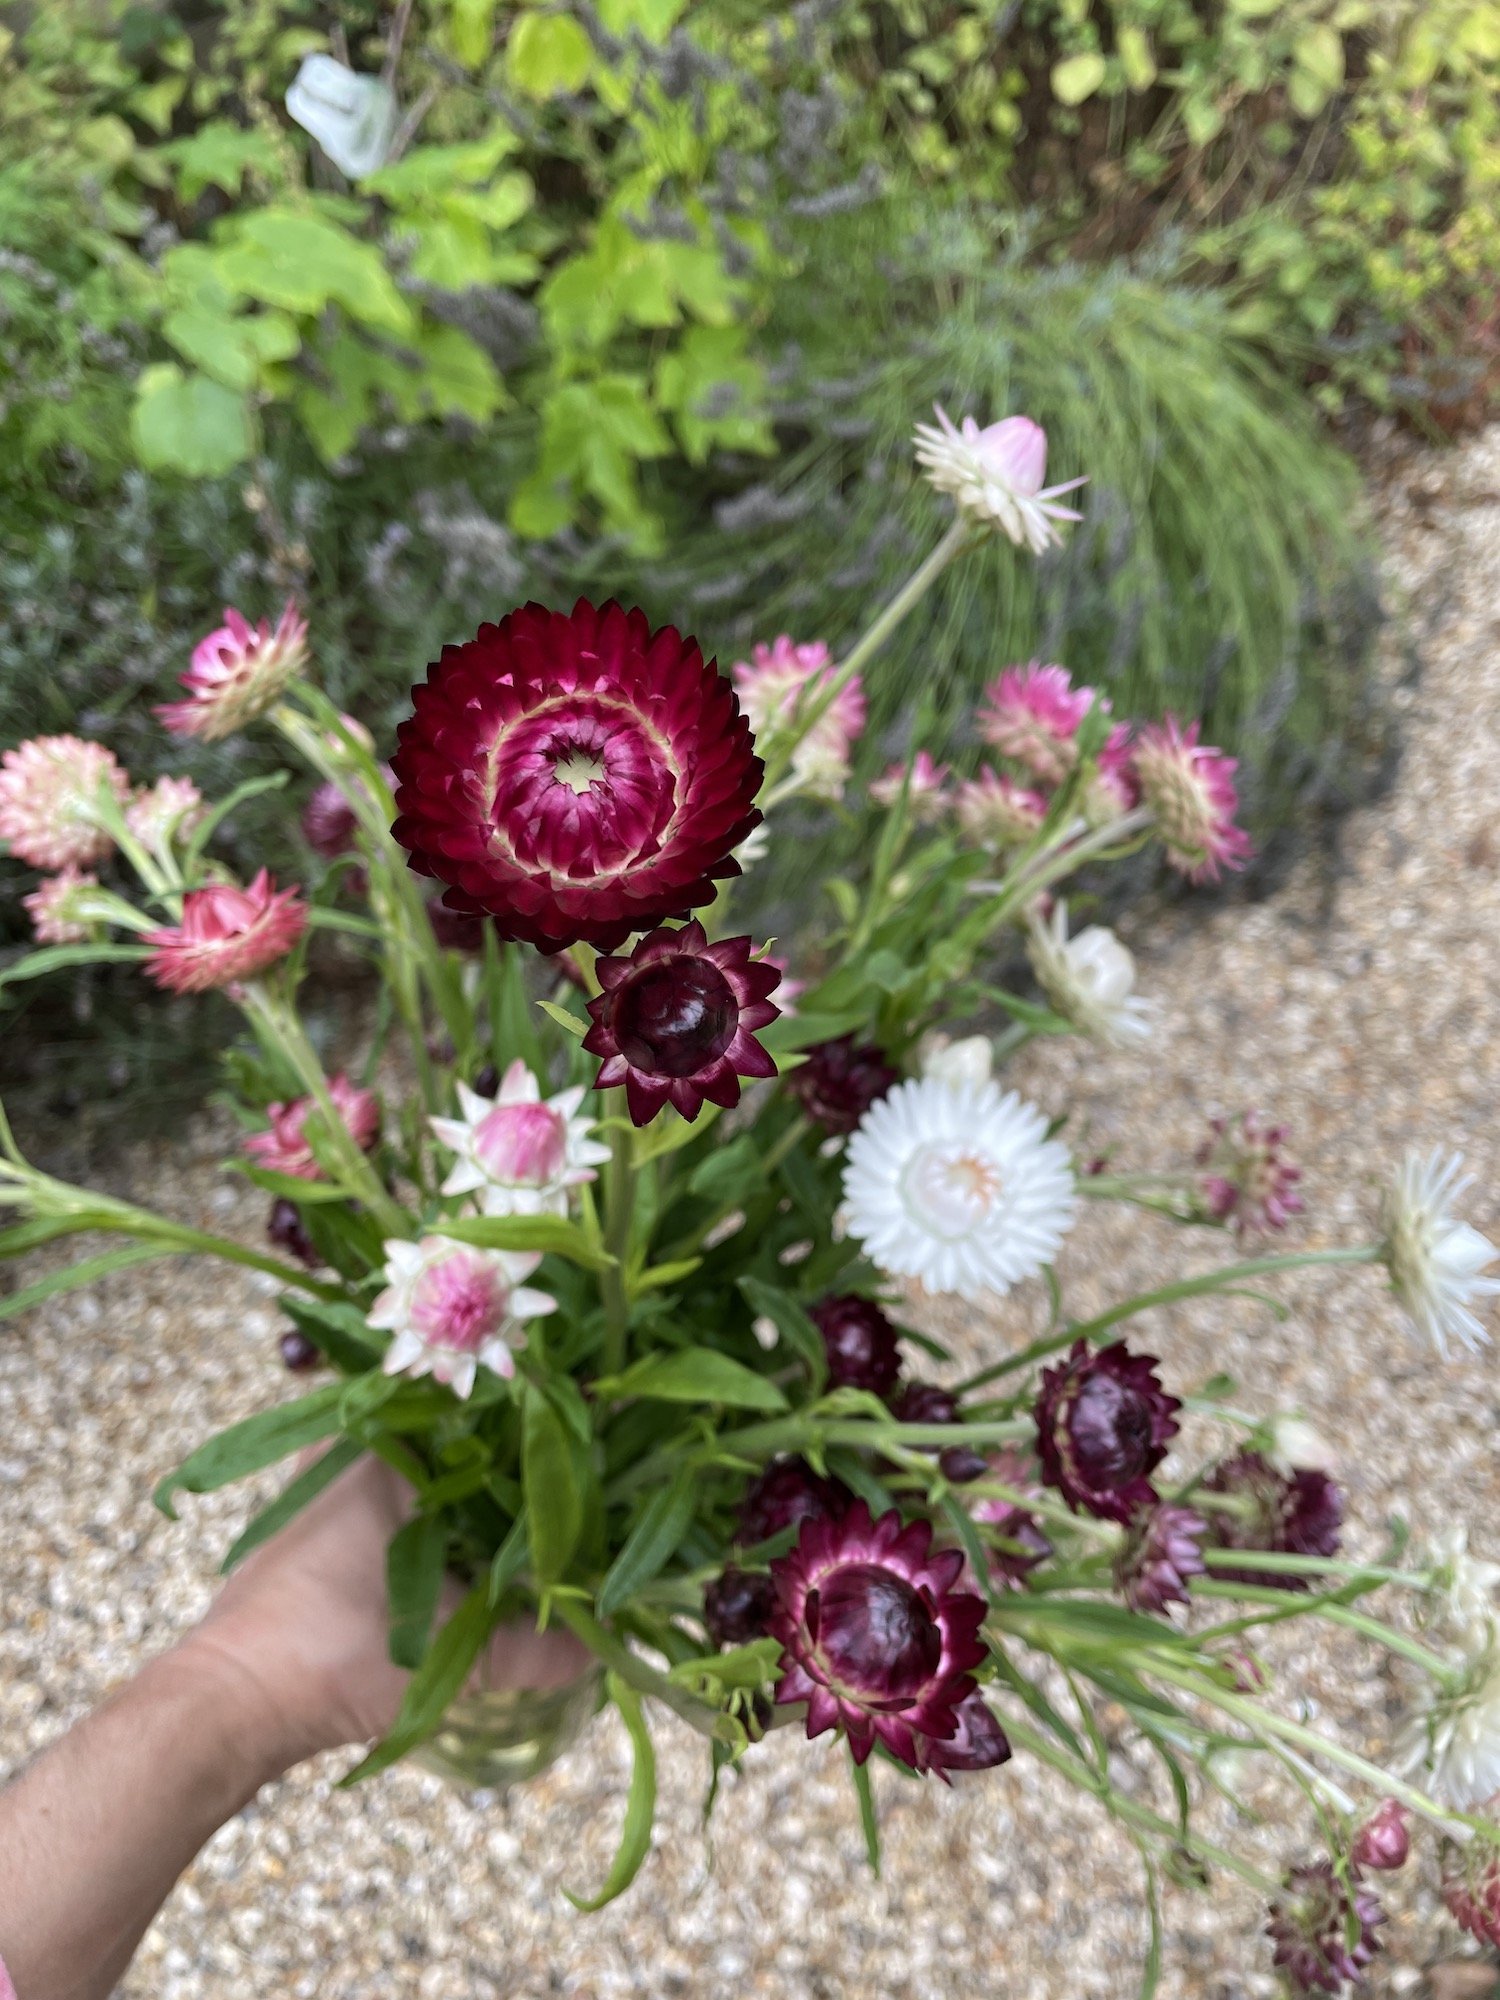
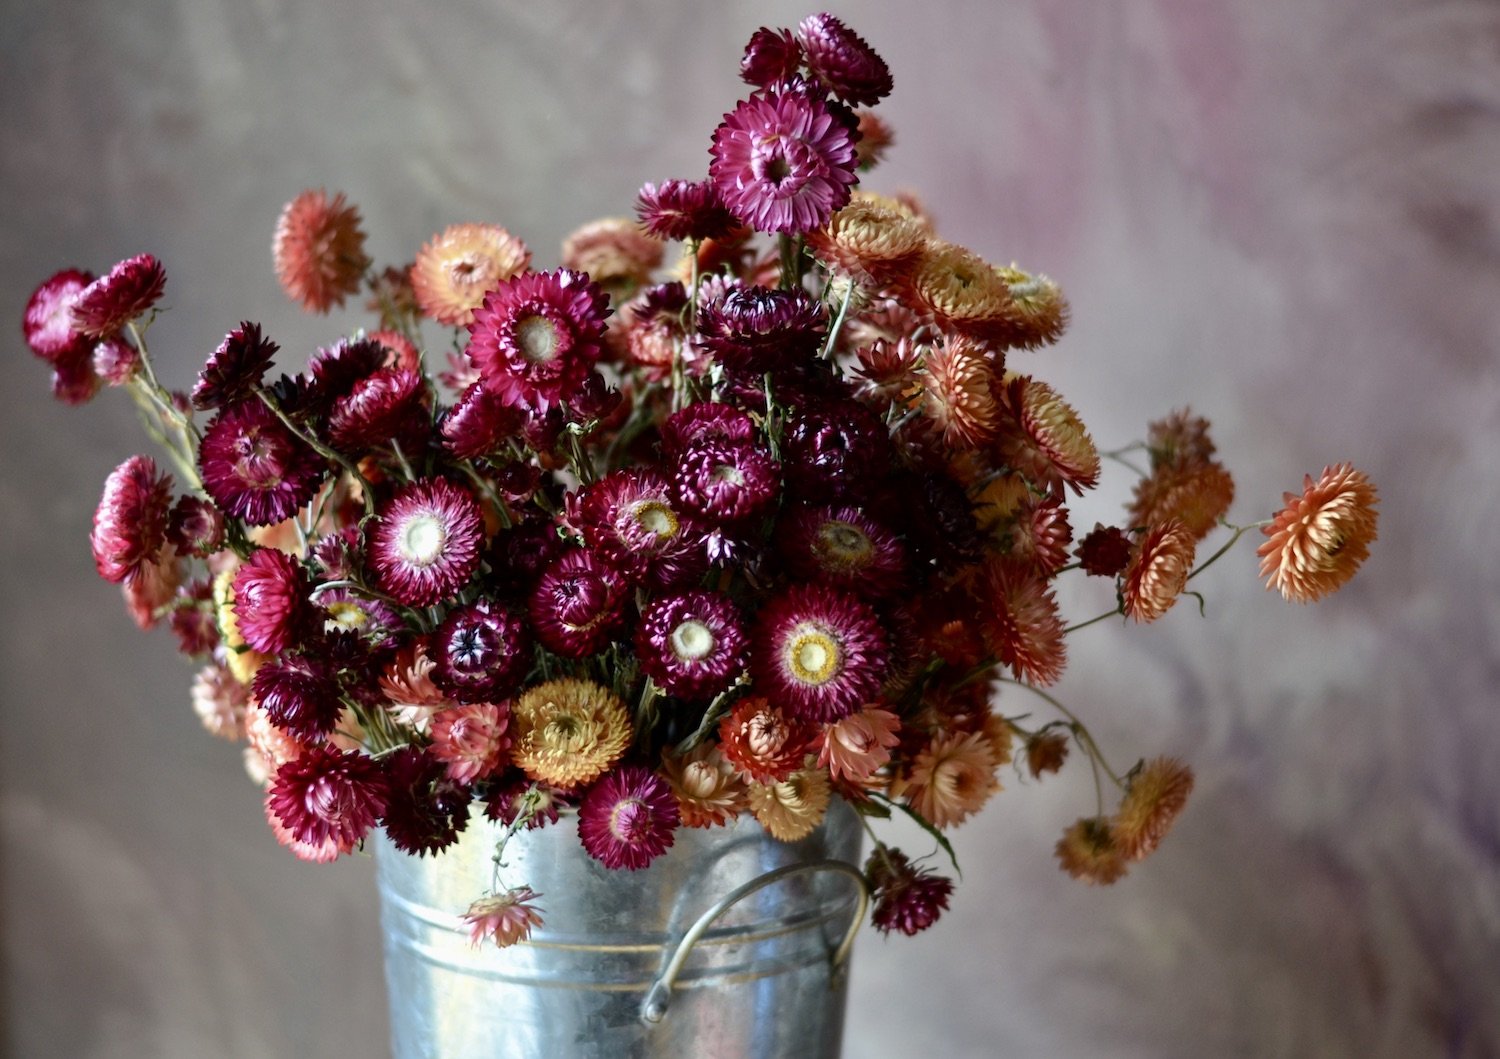
Strawflowers are the well-known papery everlastings that come in all sorts of colours like apricot, salmon rose, bright yellow, white, purple and silver rose. They’re half-hardy annuals for spring sowing and a fantastic cut-and-come-again crop. I pick strawflowers before they open fully, ideally when only a few rows of the papery bracts on the flower heads have reflexed fully, but I do pick at any point up to when the flowers have opened completely. The left-hand photo below shows the stages of opening when I like to harvest. They’ll continue to open very, very slowly as they dry so you’ll get different shapes as the flowers are in different stages of opening. Strip some or most of the leaves and hang in bunches of 10 to dry.


Larkspur (Delphinium)
A hardy annual with airy flower spikes available in shades of pink, blue, purple and white. Larkspur can sometimes be a bit tricky to germinate because it requires chilling for germination which you can accomplish artificially (in the fridge) or naturally if you have cold winters. The plants are really attractive to slugs and snails so either plant them out when they’re big enough to take some nibbling or grow them in a place that’s less accessible to slugs. I lost all my larkspur plants to slugs the first year I tried to grow them in our garden because the plants were just too small - they were munched in the first night. Cut larkspur when there are still a few unopened flower buds at the top of the stem and hang in small bunches to dry. I like to give the flowers space - the delicate petals can be squashed if the stems are too tightly packed and then they end up flattened when dry.


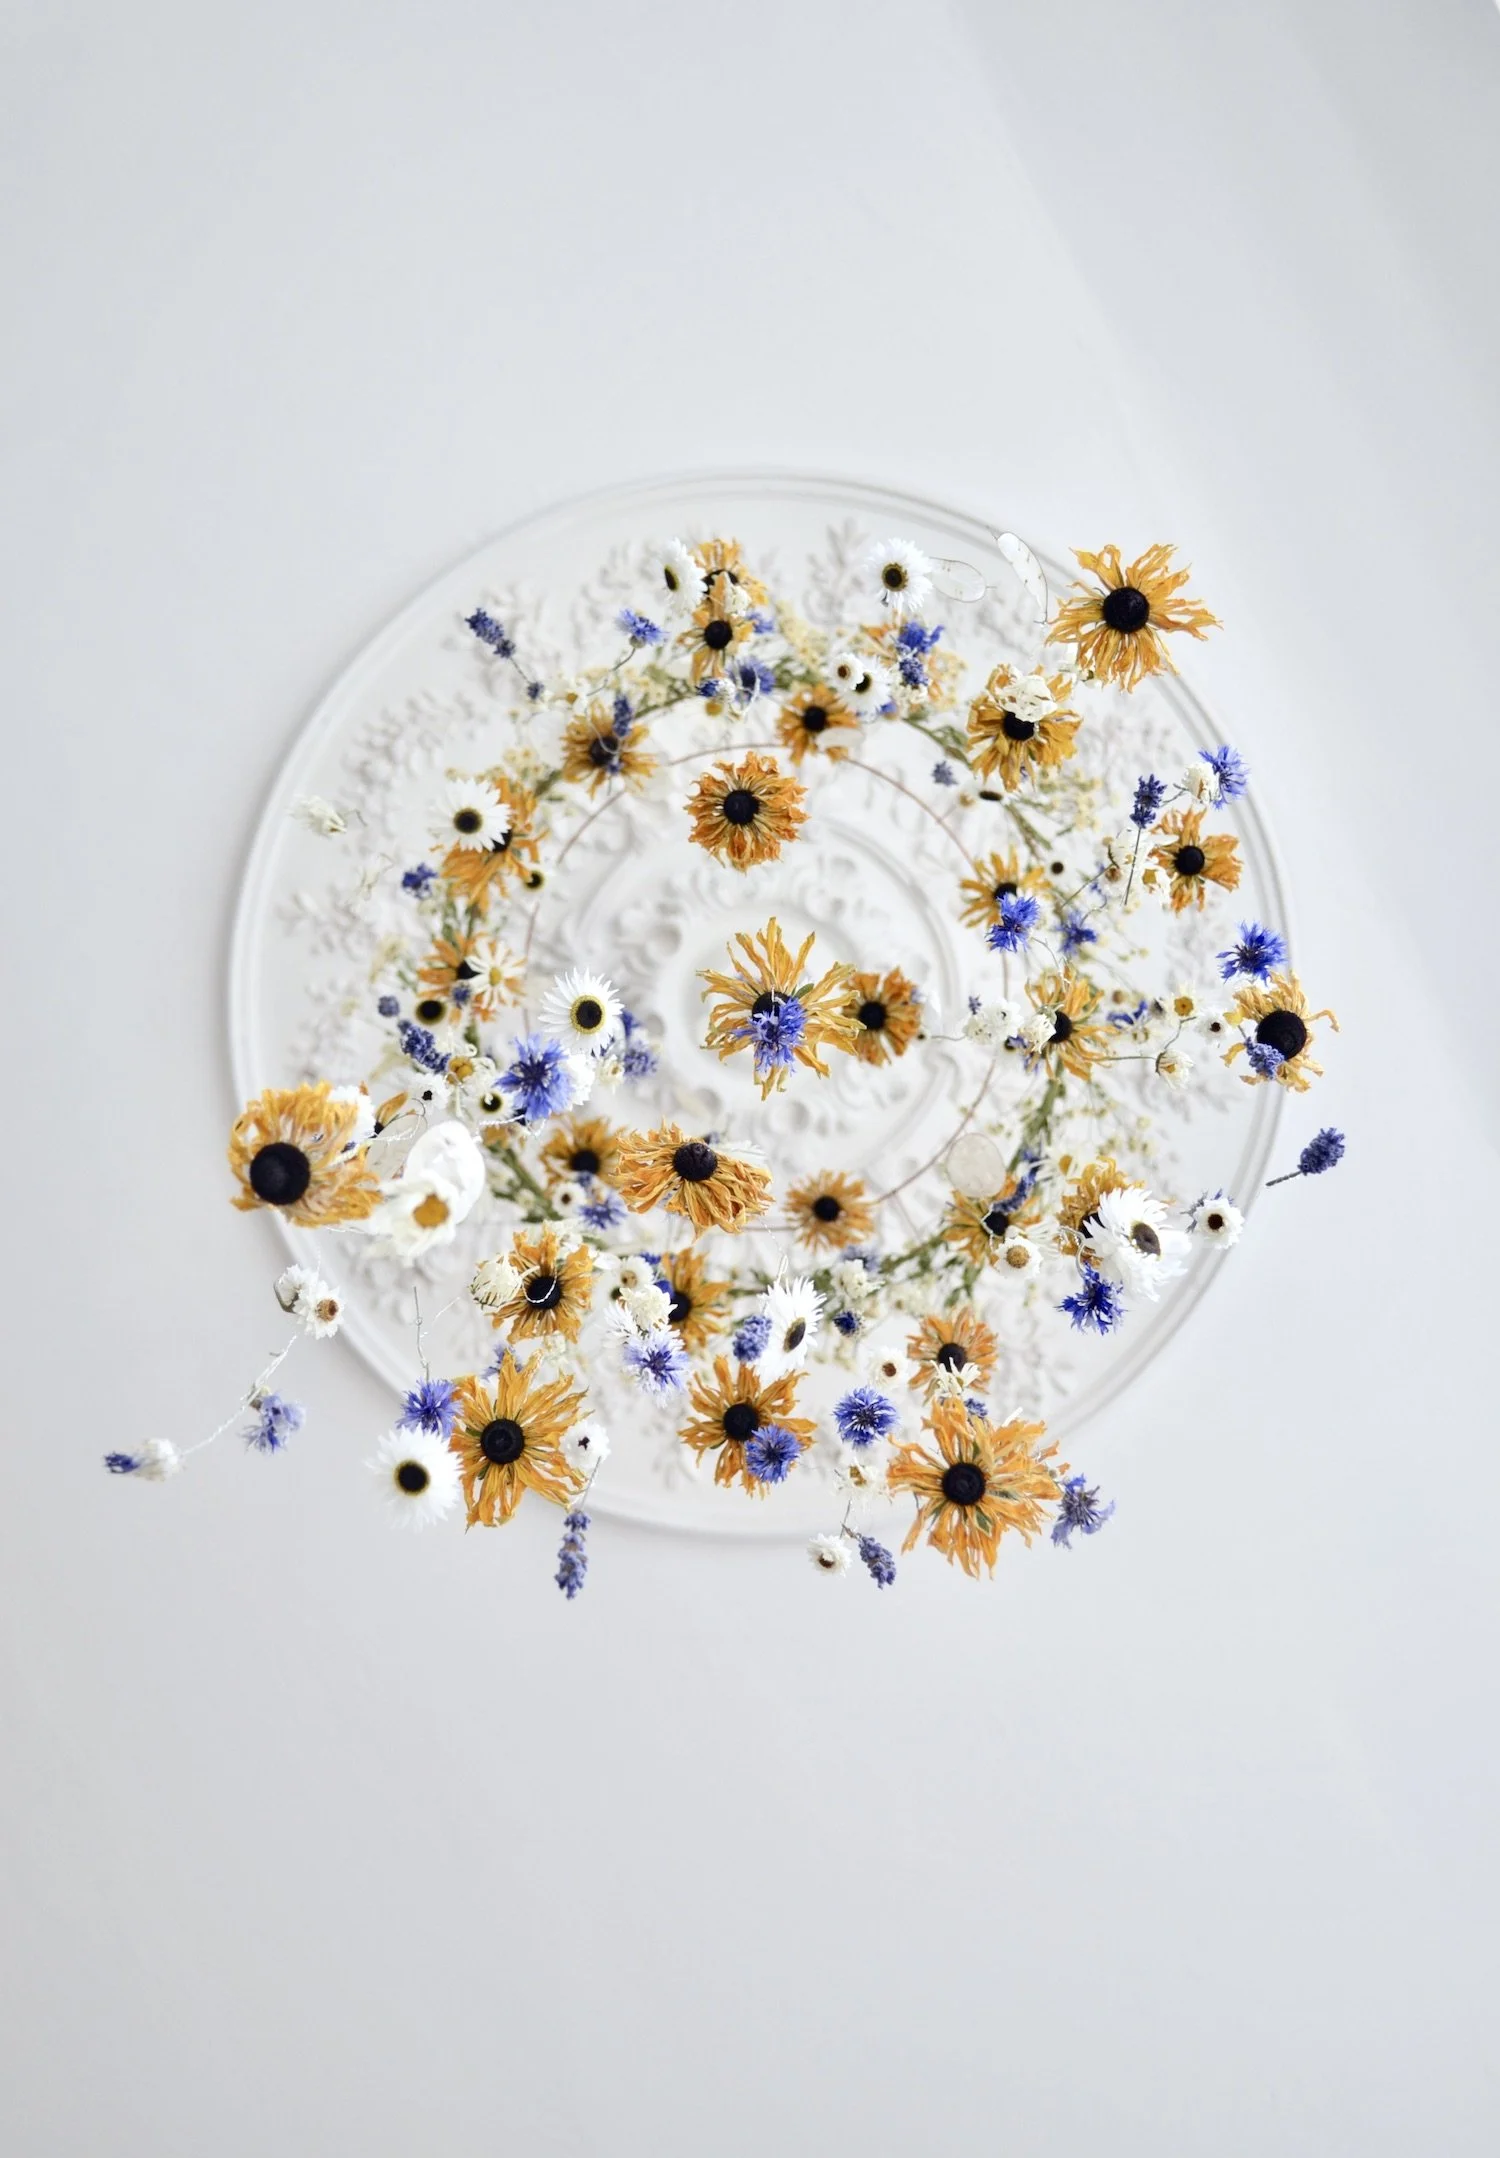
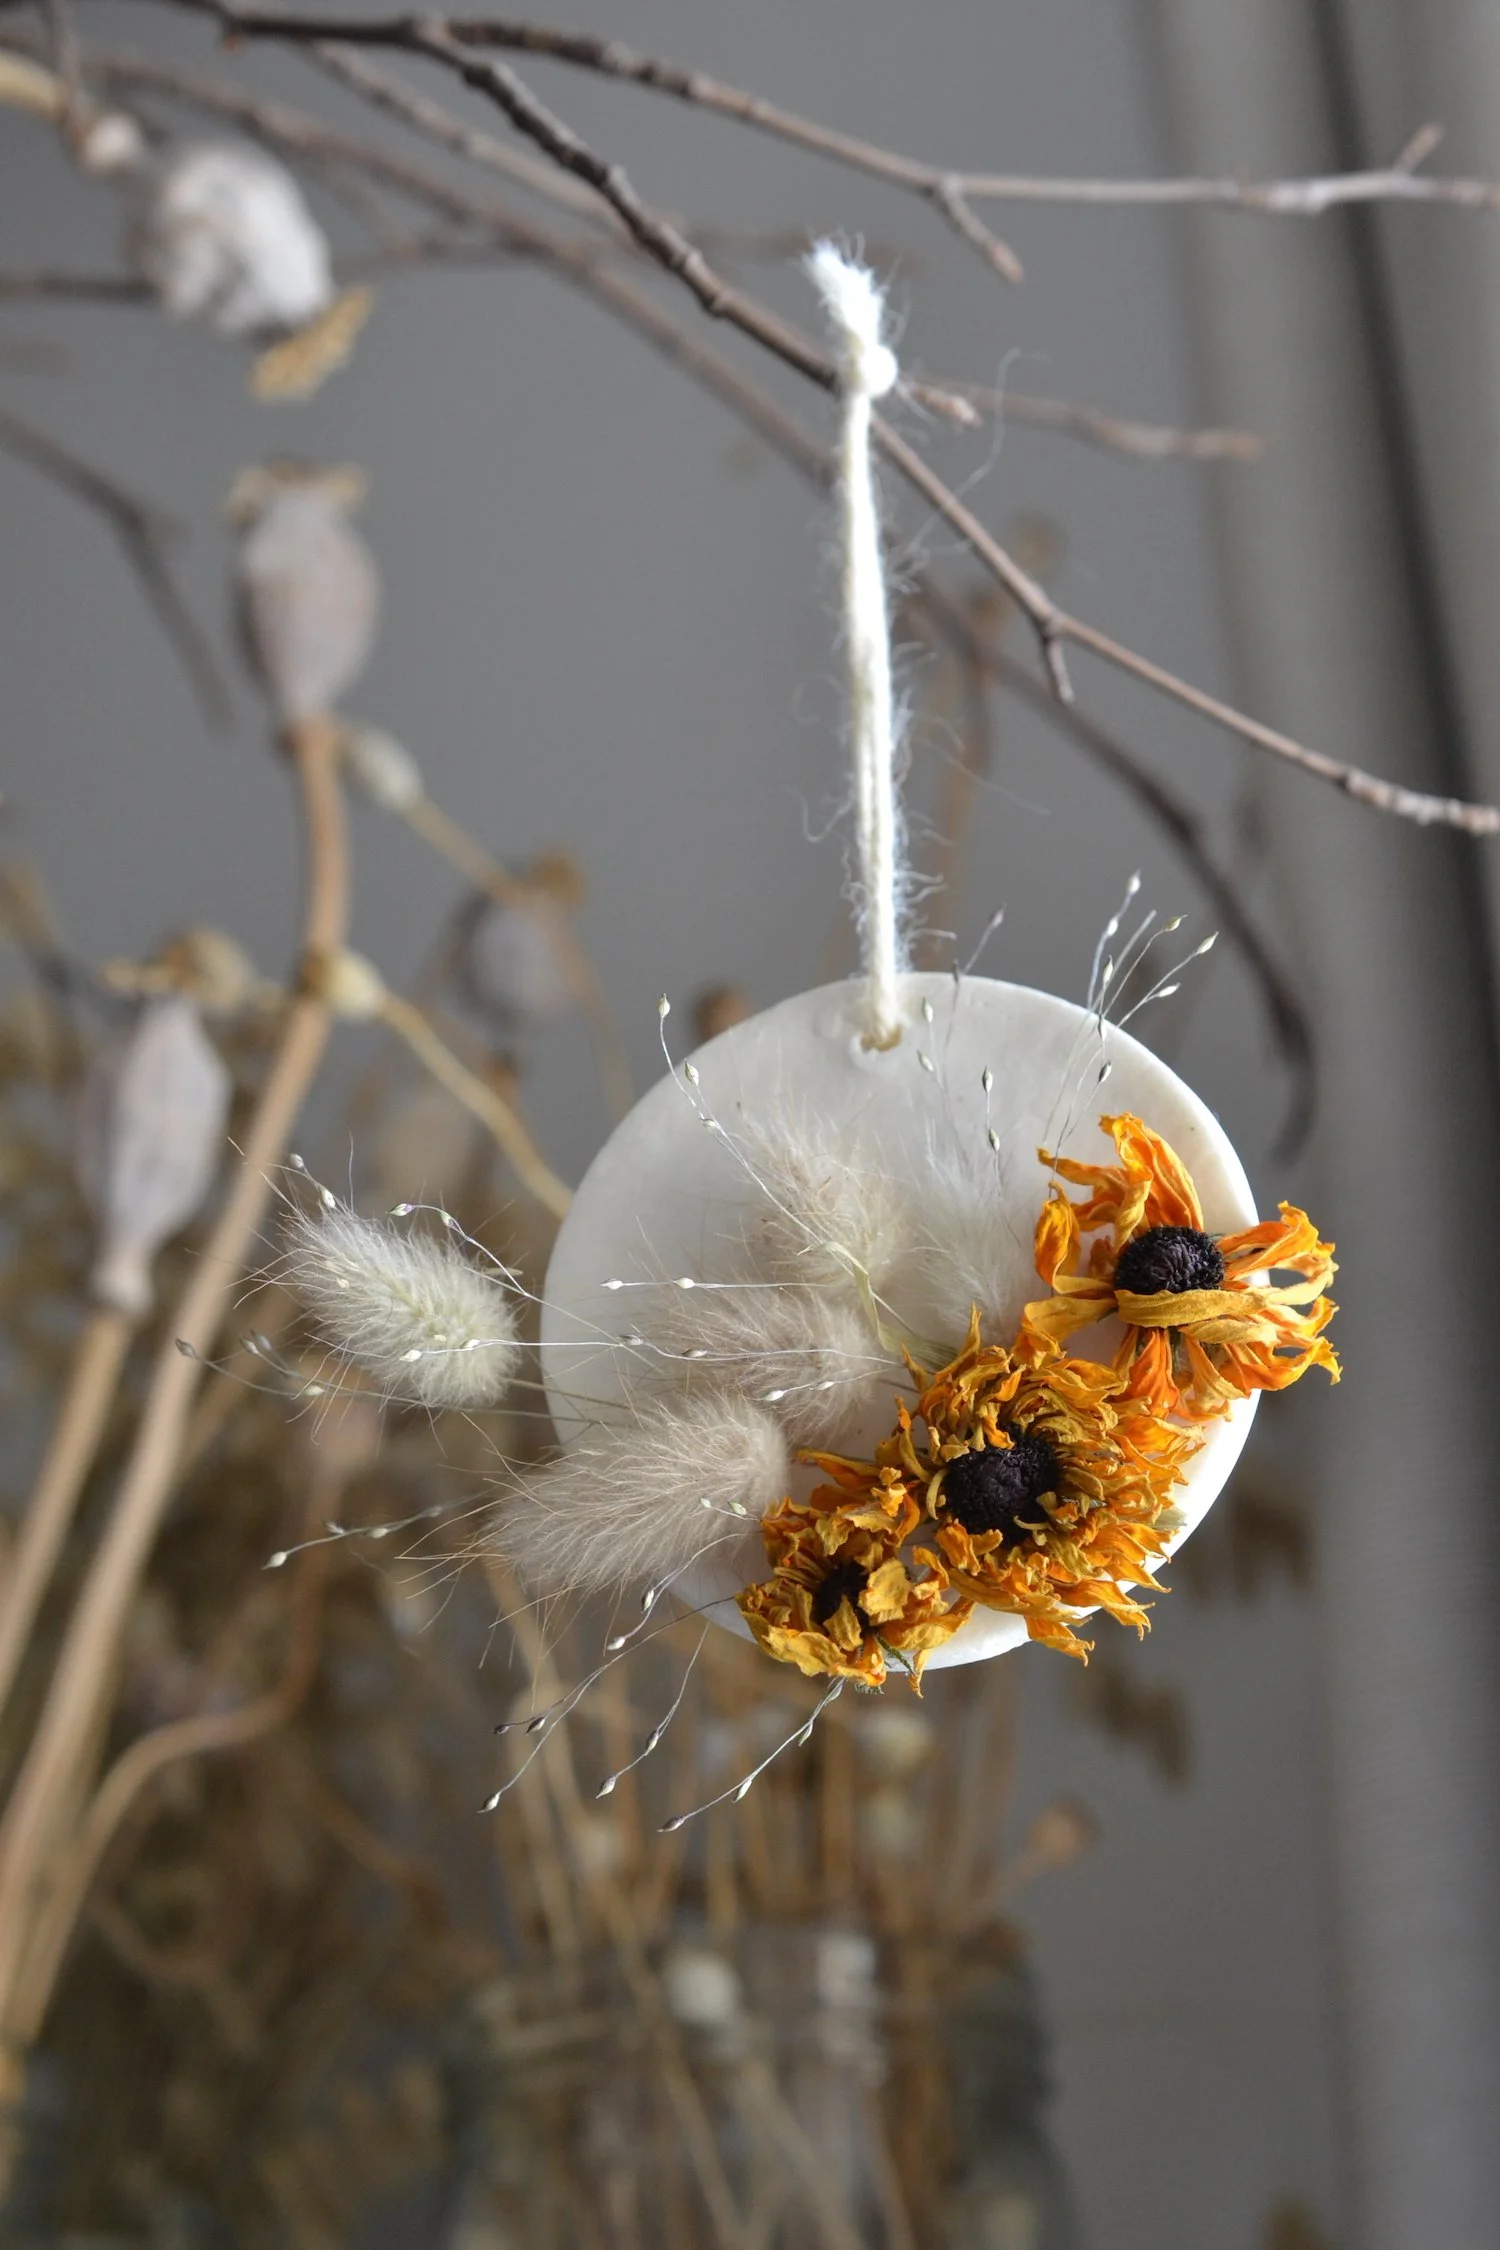
Black-eyed Susan (Rudbeckia hirta)
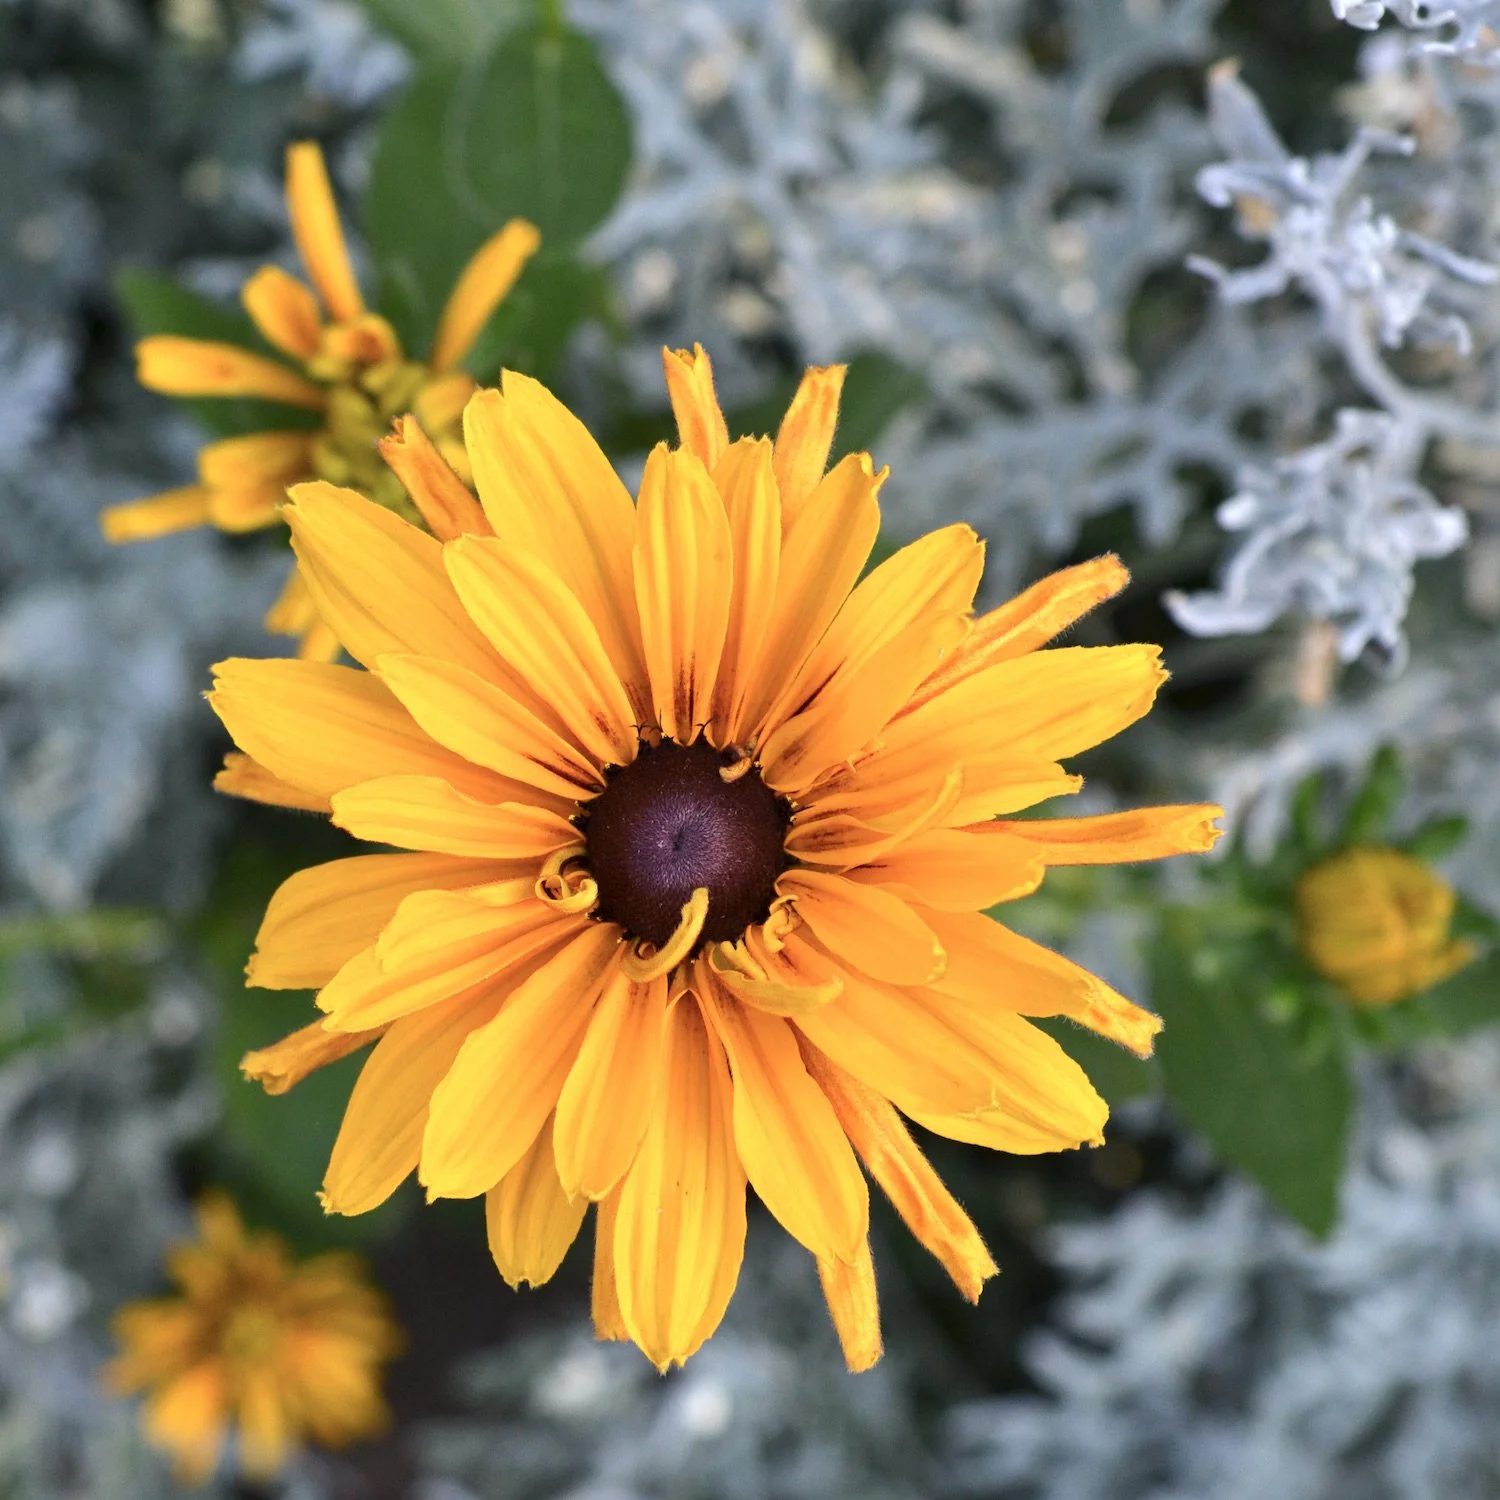
A hardy annual that produces lots of long-stemmed blooms. I like to dry the bright yellow variety ‘Goldilocks’ which has double flowers and gives a brilliantly strong colour. Cut for drying after most but not all of the teeny little flowers have opened on the brown centre (they start opening at the outside and work their way in - you can see them as a golden ring in the top right photo below). This takes ages so they’ll brighten your garden for a few weeks as you wait to cut them. Dry the flowers face up on a layer of chicken wire (or a garden sieve) so the petals stay open and flat (I shared an earlier blog post about drying them this way). Or dry upright in a vase (without water) so the petals droop in a pleasing way (best for older stems that are very stiff). Or hang to dry so the petals close up over the centre. The small side shoots dry well too and are perfect for smaller projects like hand-made ornaments.


Statice (Limonium sinuatum)
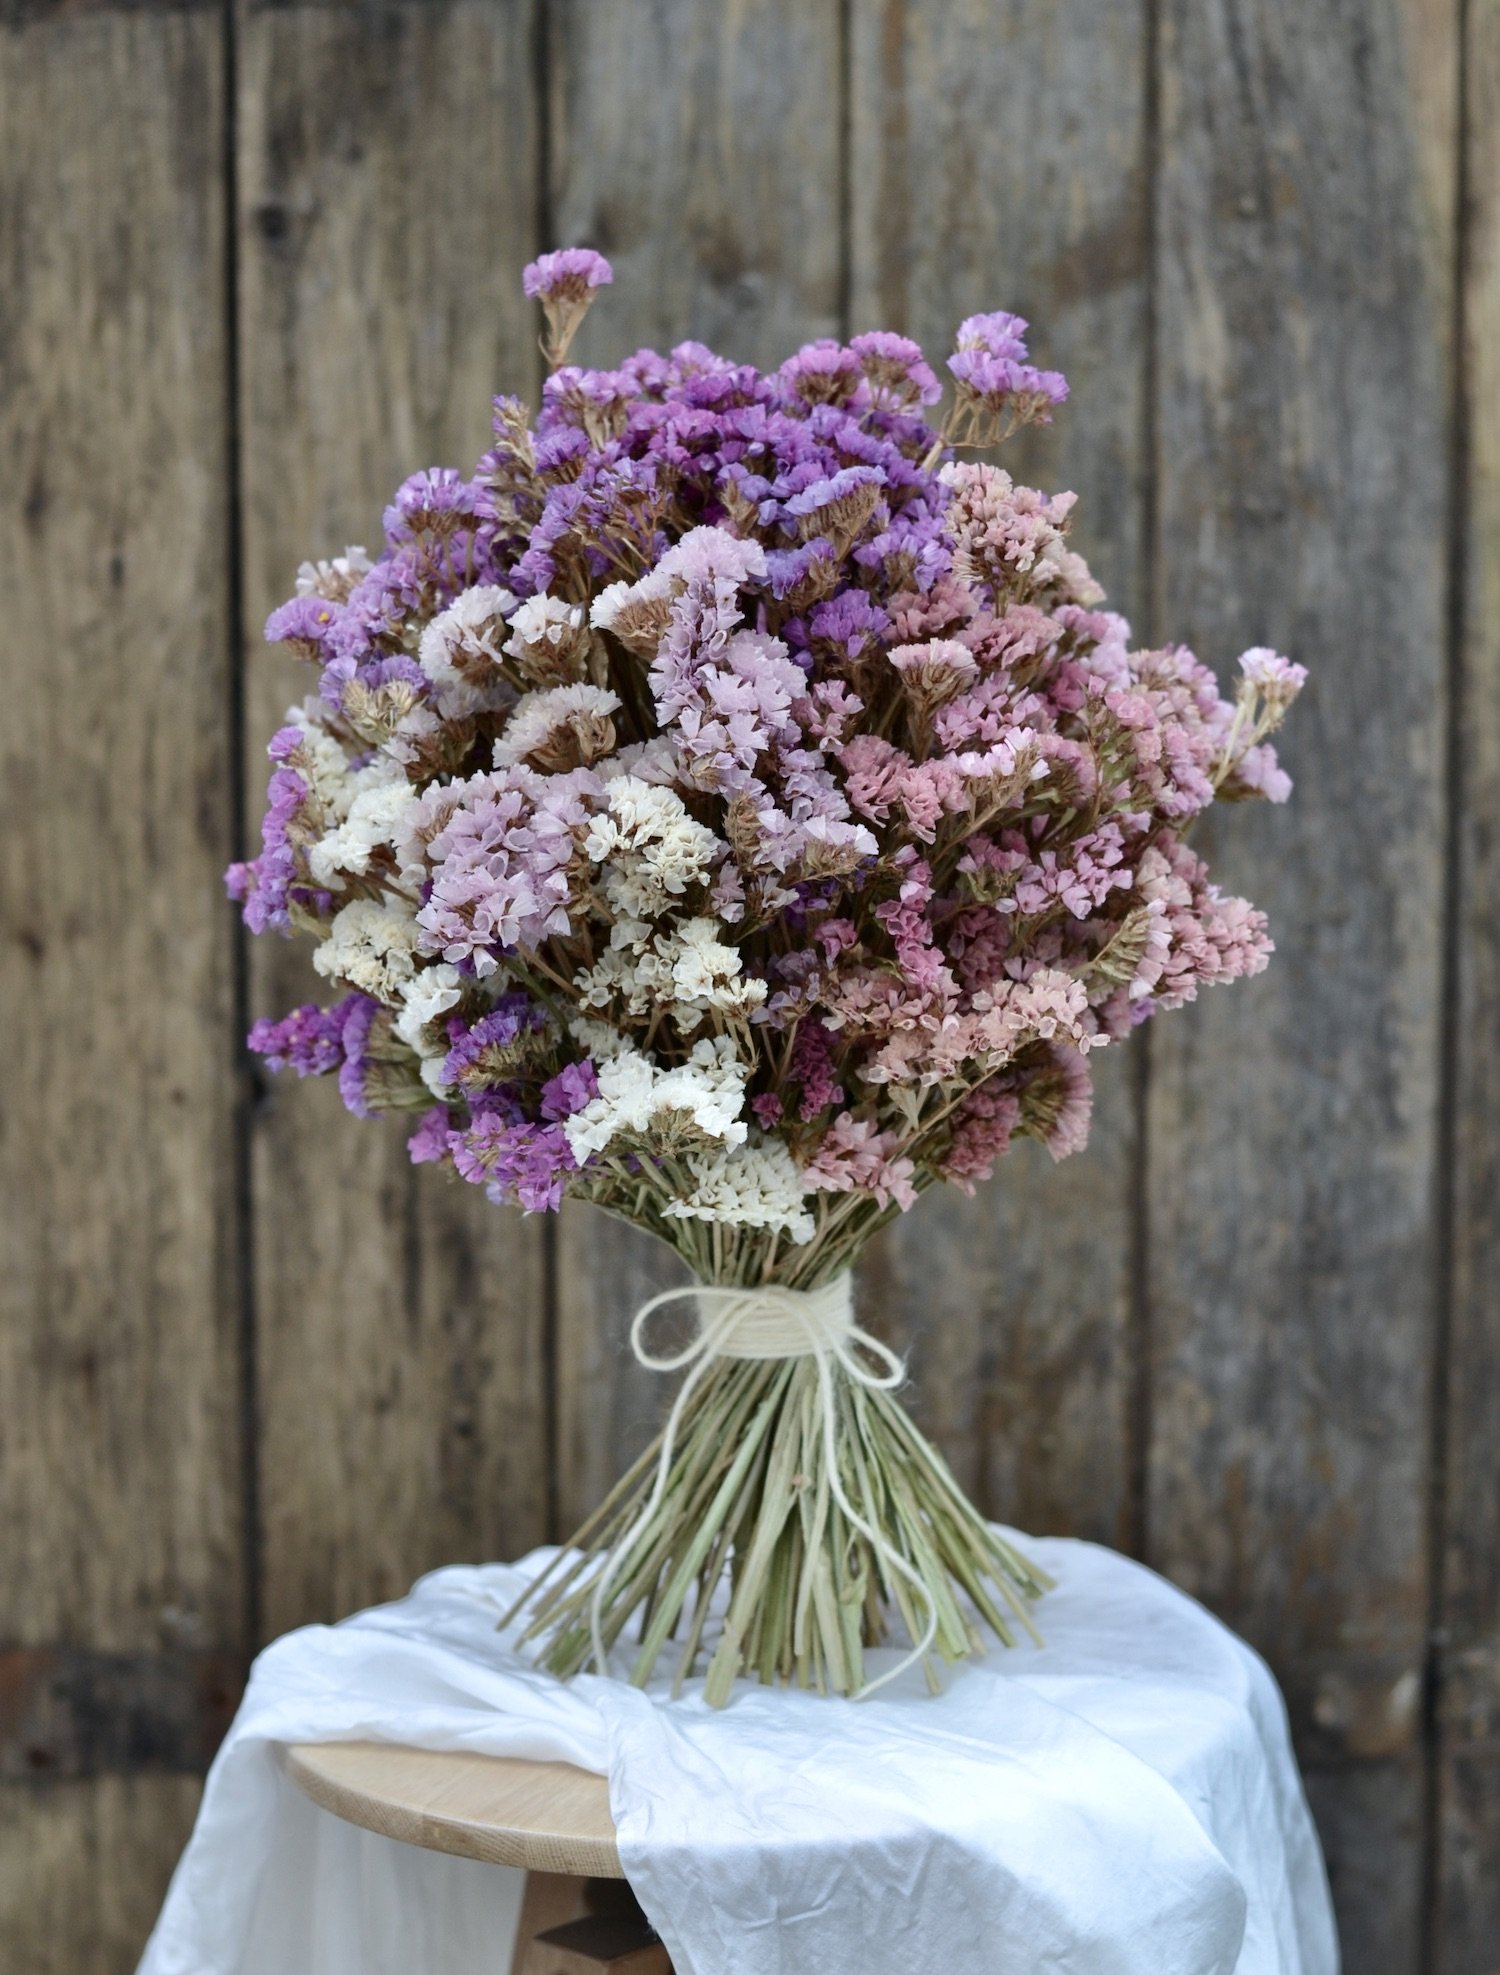
Another well-known papery everlasting. Statice is a half hardy annual and very easy to grow in pretty colours like blue, apricot, white, pink and purple. Thankfully it doesn’t seem to be attractive to slugs - none of my plants were nibbled this year in our slug-rich garden. The plants produce multiple stems from the base throughout the season. Cut when all or nearly all of the flowers on a stem are open and hang to dry in bunches of 10. The dried flowers do have a tendency to drop florets easily when bumped or over-handled so take care when arranging. I think statice looks amazing when arranged in en masse and give the perfect cloud-like texture to larger designs like hanging installations.


Zinnia (Zinnia elegans)
So many varieties of zinnia (a half-hardy annual) are available these days, but my favourite for drying is ‘Oklahoma’ because I find it to be the perfect size for dried flower arrangements. You can dry large-petaled varieties too, using the same techniques as for Rudbeckia. I give my zinnias a long time to open before cutting because I want the dried flowers to have lots of layers of petals so that at cutting time, they look like a rounded dome rather than a flat disk. By the time I cut them, the stems are very ripe (stiff) so I can dry them upright in a vase (without water). If they start to droop at all, I just hang them upside down to finish drying.


Picking and drying - general tips
For any flower that you’re going to dry, pick on a dry day after any morning dew has evaporated and pick your flowers when they’re at the right stage (as described above). Picking flowers too late can result in flowers dropping off because they’ve set seed, and if a flower was looking tired and worn when you picked it, it’s going to look even more so after drying. So be sure to pick when your flowers are at their best! Try to prepare your flowers for drying as soon as possible after picking, but you can leave them in a vase of water until you’re ready and dry off the stems before placing them to dry in a warm, airy location.
How do you tell when your flowers are fully dry? While drying, flower stems feel cold to the touch and often still have floppy leaves and flower heads. Continue to leave them to dry until the stems no longer feel cold and the stems are absolutely stiff. The length of time to dry depends on the type of flower (less fleshy flowers dry faster) and the drying environment.
I hope this was useful for anyone who’s new to flower drying and wants to give it a try. Let me know in the comments if you have any questions! Next week I’ll share some perennial flowers that I think are fantastic for drying.